
Table of Contents
This screen is designed for managing forms, allowing users to create, edit, copy, delete, view, and publish forms. The publishing screen enables users to configure form settings, select sessions, and assign the form to specific students before saving.

New Form #
Publish Form #
To create a new form:
- Click the “New Form” button.
- Enter the title.
- Write the details in the text editor.
- Specify whether you want to display items one by one.
- Set the publish date and closing date.
- In the Usage and Privacy Policies section, upload a file.
- Select the certificates from the dropdown list.
- Select the section, and if you want to add another section, click the Add Section button.
- If you want to write a description, do so.
- Click the Next button.
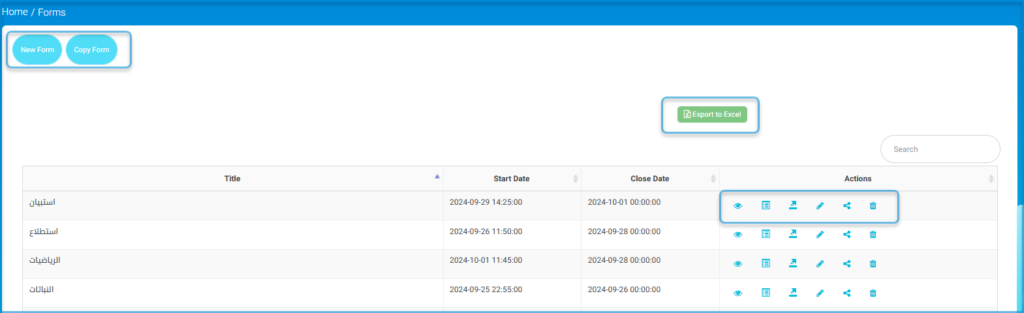
- A table will appear containing the entered details such as the title, section, publish date, closing date, and the Actions column.
o manages a specific form, locate it in the table and use the “Actions” column:
- Click the Edit icon to edit the form details.
- Click the Copy icon to duplicate the form.
- Click the Delete icon to remove the form.
- Click the View icon to preview the form.
- Click the Publish icon to open the publishing screen.
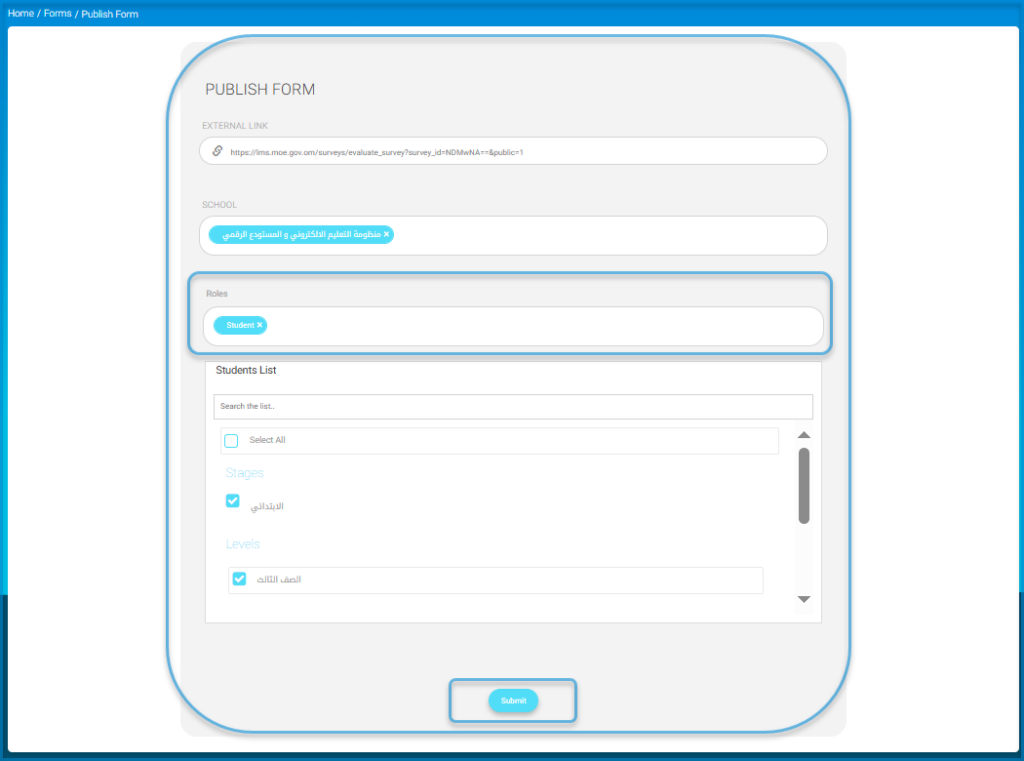
In the Publishing Screen: #
- Enter the external URL if required.
- Select the school.
- Click the Add Students button to choose the students who will receive the form.
- Use the student list to select specific students by checking their names, or use the Select All option to include all students.
- Once all required fields are filled out, click the Send button to publish the form and save the changes.


