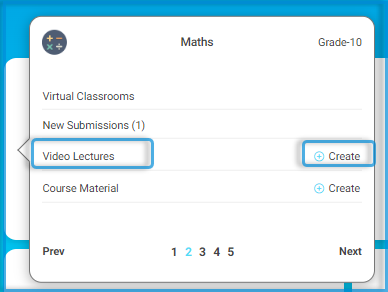
The system provides teachers with the ability to upload and manage video lectures to support the e-learning process.
You can add a video lecture from the Manage Content page by clicking the Add button, or you can add it from the second tab in the required course by clicking Video Lectures.
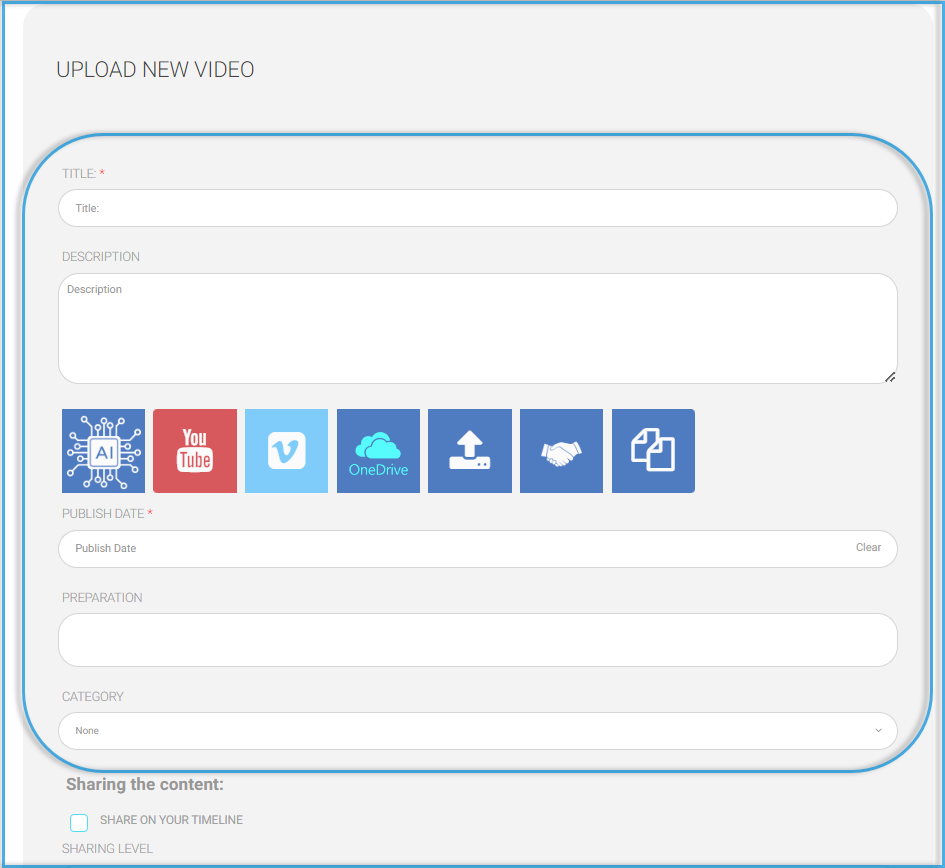
Choose the video source. (YouTube, Vimeo, or upload from your device). If you selected YouTube or Vimeo, copy and paste the video URL into the box below.
Add the date when this content will be published to students & parents.
Select your preparation related to this content. It will be selected by default if you are already adding it from inside your lesson preparation.
You can define the categories from the course material page. This is useful if you would like to classify the contents into different types.
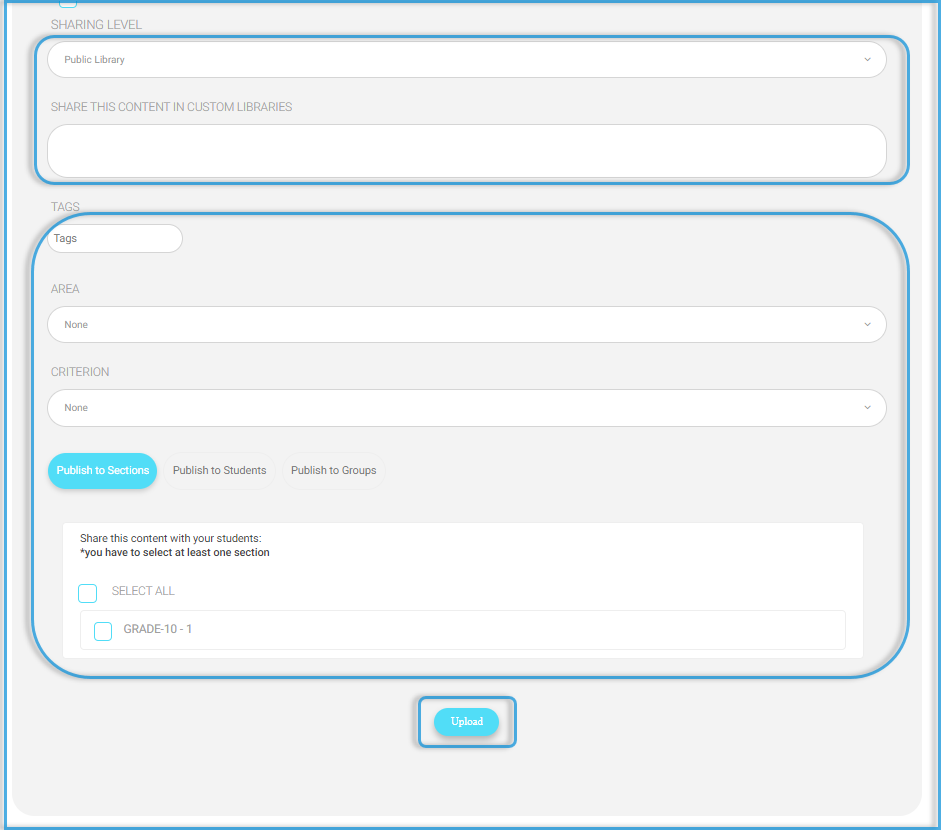
Share this content to appear in your timeline.
Select the sharing level for this content:
School Level: Only your school users can find your content in the digital library.
Non: This content will be available for you and your students only.
If the school has added custom libraries, you can select any.
Select whether to publish to all classes or certain students from the tab Publish to students.
The list of added video lectures will appear, and you can perform several actions from the Actions column, such as viewing the attachment, editing, or deleting. You can also click the Statistics button from the dropdown menu to view a report of students’ views.